Dan Jennings, professional taxidermist of Zanesville, Ohio, shares some really good techniques with us.
Dan cannot be called a “late bloomer.” He started his taxidermy career by taking a mail order correspondence course at the ripe old age of fourteen. After a quarter of a century of experience, he has picked up more than a couple of tricks.
Day says, “A professional working taxidermist can not take the time and money that it takes for a competition piece and turn out commercial mounts. He would either make no money, or go out of business. He has to figure out how to keep material costs within reason, and how to cut down on his work time without sacrificing over-all quality in the finished mount.”
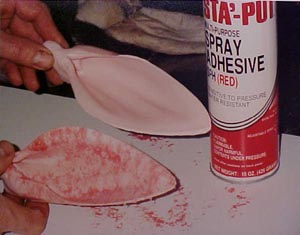
“I want color on the inside of my finished ears. Here is a technique that is inexpensive and goes really quick.”
“This technique works especially well with the Whitetail Designer System.”
“I use the Eppley ear liners because they already have the pink color and I can position the buttless liners in poses like a live deer would take.”
“I don’t sand or wash the liners with any kind of solvent. It is not necessary and I have absolutely minimal to no drumming. Even if I do have a minor drumming spot, the Whitetail Designer System will stay soft long enough that I can inject more adhesive into the spot with a hypodermic needle.”
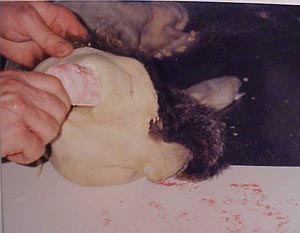
“I use Sta-Put Spray Adhesive as pictured. The stuff comes out of the can kind of “stringy”, and it looks a lot like blood veins when it goes on! One can lasts for months for ear liners, but I have found all kinds of uses for it here in my shop.”
I have spent hours on ears for competition that didn’t come out looking this good, and this procedure takes no time.”
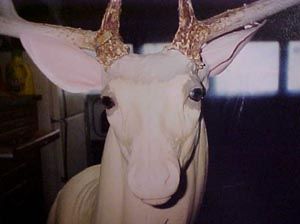
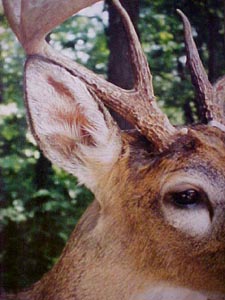
Editors note: Once again, remember the vein pattern in the specimen ear? Notice on the upcoming photos the hair tracts inside the ear. The smaller branched veins radiate out from the hair tracts. We do not have a close-up photos of the inside ear of the finished mount, but this photo will give you a pretty good idea of what you would see.
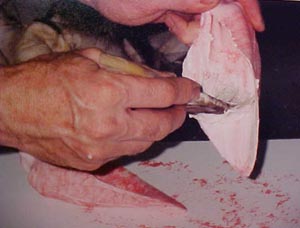
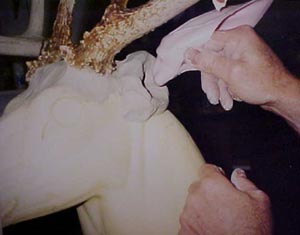
“I use Buckeye Hide Adhesive. That’s the stuff that goes on white and drys clear. I give a generous coat to the inside and backside of the ear liner.”
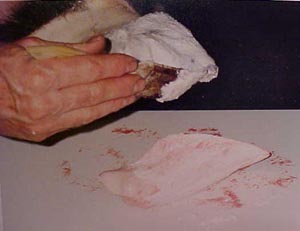
“I apply a light coat of the adhesive to the inverted ear skin.”
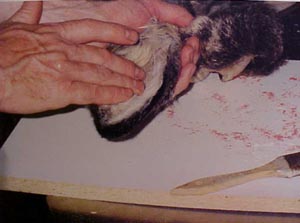
“I turn the ear skin right side out and insert the ear liner.”
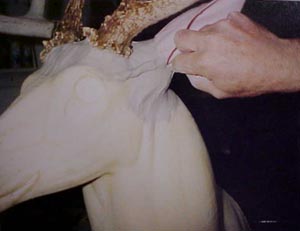
“I press firmly and work out the air bubbles. I work quickly and shape the ear. The adhesive will set quickly, normally in about two hours.”
“Start grooming and shaping the hair right away.”
EDITOR’S NOTE: For demonstration purposes, Dan has left the cape off the form.
For a full or long incision, preparation could be done as pictured, but no one really likes to sew that much.
Dan’s normal procedure is to use a cape with a long “Y” incision. He slides it onto the form, and then pulls the cape forward far enough to expose the work area of the eyes, ears and skull plate.
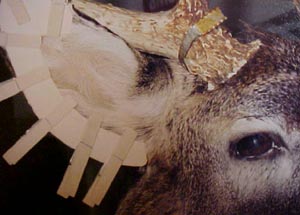
“I used to set my skull plates in a Bondo bed and take measurements from the center of the nose to the antler tips and from the eye corner to the antler burr.
Now, I set the skull plate with three drywall screws, and I use metal or hardwood shims to line everything up. I fill in and blend with earth clay. I only take a measurement from the center of the nose to an antler tip. After you do a few hundred of them, you’ve got a pretty good idea where everything is supposed to go.
I make my ear butts out of earth clay, starting with a donut shape.”
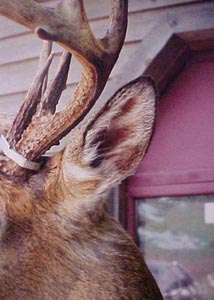
“I’ve noticed that if you hold the ear liner between your thumb and finger at the “V” and set it in place, you can just about feel how the ear would naturally rotate.”
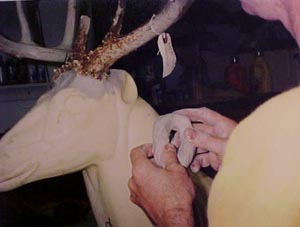
“I use my thumb to shape the dent in front of the ears.”
“I set my eyes and shape the lids with Critter Clay, and then remove the model ear liner. The mount is now ready for finishing.”
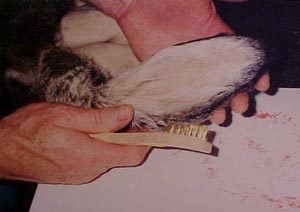
“I use manila folders for my ear cards. The fold of the folder makes the fold for the card. I just trace the outline of the liner onto the folder and add about ½” for the width. Clothes pins hold everything in place.”
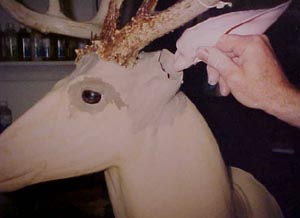
“Carding the ears is about the last thing I do in the mounting process. I go back over the ears with a wire brush. I use styling gel on the ear edges and some of the hair patterns around the ears. Then I place the cards. This procedure gives a nice, thin edge appearance to the ear. The adhesive squished out helps to fill irregularities and edges. It bonds to the ear liner and actually becomes part of the ear liner.”
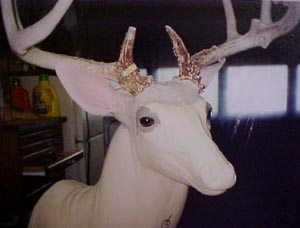
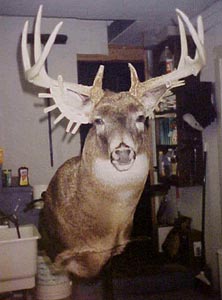
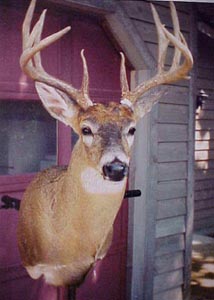
“These are different views of another mount that was done with this ear technique and the Whitetail Designer System.”
“The dry time for these materials varies with temperatures and humidity. I like to put a fan on a mount for the first 24 hours after completion, it seems to make a world of difference in drying. The ears may be dry in 3 days. That’s when I take the cards off and check for any problems that may need correcting. The ear butts may take 5 to 7 days. I feel everything is ready for final finishing at 7 days.”
“Also, I might add at this time, I keep a number of bath towels in my shop. Between each step of the Whitetail Designer Systems process, I roll the cape up, with its flesh side out, between two towels. I lay out one towel. Spread the cape out on it, lay another towel over that, and then roll everything up tightly. I just let everything sit for 4 or 5 minutes. The towels rid the excess moisture quickly.” (Editor’s note: Dan uses the time frames in the instructions for each product as directed before doing this procedure.)
“I bought six dry salted capes for my customers this last season. I soaked them up in plain water until they became limber. That took about 6 hours. I then put them straight into the Leatherizing Acid solution. All those capes came out really well, and the hair was really tight.”
Editor’s note: If you can not find Sta-Put Spray Adhesive (red) through your lumber yards, hardware stores, cabinet supply, “etc.”